


Introduced in 1979, the B&W 801 has been used as a monitor speaker in studios around the world, including EMI Abbey Road Studios in London. After the Matrix801 went on sale in 1987, it made minor changes to sries2 and sries3, and was produced without major design changes for about 20 years until 1998 when the Nautilus801 appeared.
When the Nautilus series was announced, I was surprised by the wonderful design and finish, but the price range and timbre were slightly different from the Matrix series, so Isn't there a lot of people who still favor the Matrix series ?
One of the design features of the Nautilus series is the topknot tweeter called the Nautilus Head. It's splendid construction, and I feel a huge difference from the simple plastic case of the Matrix series.
 The tweeter sits on top of the squawker box, and when I actually hit the case, it sounds like empty, cheap hard plastic. I feel like it would have a bad effect on the sound quality.
It's a bit disappointing because the woofer and squawker boxes are made very solidly. So, I decided to do something about this tweeter box this time.
If you would like to try it, please do so at your own risk.
The tweeter is secured with bolts and nuts from inside the squawker box. So to remove the tweeter, you must first remove the squawker.
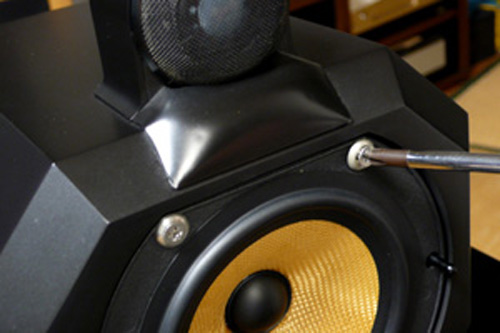 1.Loosen the four screws that secure the squawker.
I think the original was screwed with a black screw through a rubber bush, but mine is attached directly with a stainless screw after removing the bush. It seems that there is a specified tightening torque for the screws of each unit of this loudspeaker, so if you are concerned, it is better not to remove them. Mine has already removed the rubber bush, and I don't care about the tightening torque at all, so I will remove it at once. 2.The squawker itself can be easily removed by unscrewing all 4 screws.
Be careful not to drop it as it will come loose under its own weight. If you remove the squawker, you can see the bolt and nut on the top, but if you loosen this nut, the tweeter will come off.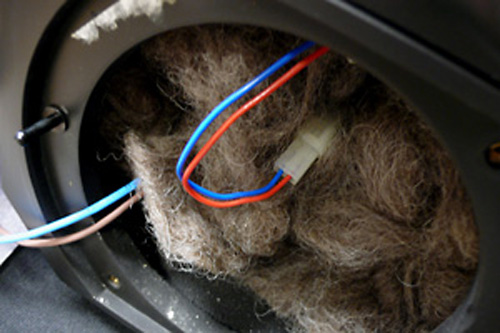 3.When you pull the tweeter cord, the connector will come out from the back, so you can disconnect the tweeter cord here. It's a little stiff, but I think you can pry it off a few times. I don't think Japanese loudspeakers use connectors or the like, but are they easy to replace on the premise that they will be used for professional purposes ?
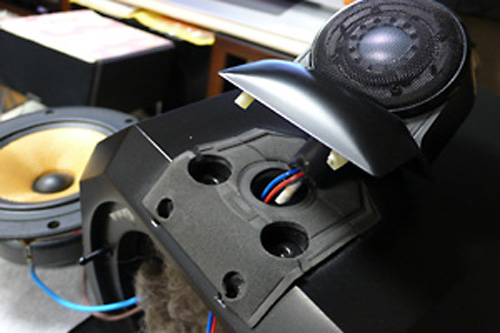 4.You can easily remove it by removing the nut completely and lifting the tweeter box lightly.
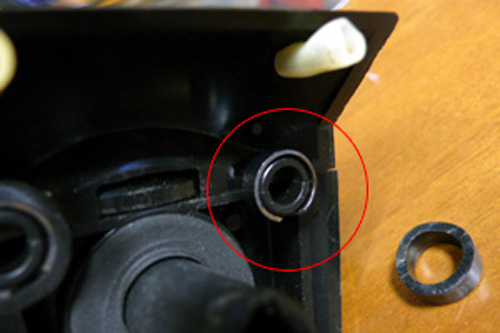 1.If you look behind the tweeter you removed, you'll see that the front reflector panel is secured with an O-ring, so take off the cover's rubber band and remove the O-ring. Installing this O-ring may be the most annoying part of your assembly. It was hard to attach, so I used needle nose pliers to spread it out a bit to make it loose, then fit it in.
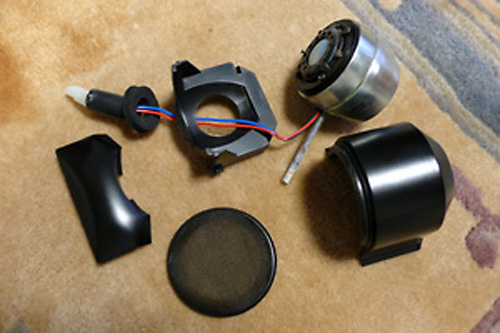 2.Next, remove the tweeter's protective net and it will fall apart as shown in the picture.
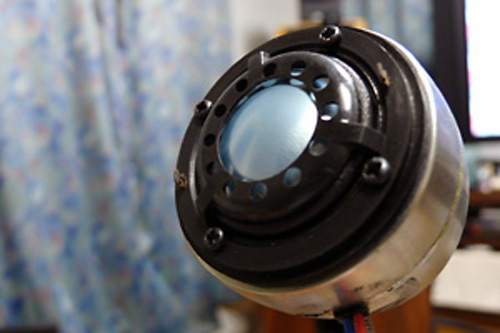 3.This is the Marix801/802 tweeter.
The tweeter is quite heavy.
The tweeter box is just a plastic cover without any anti-vibration measures. It doesn't seem to take sound reverberation into consideration, nor does it aim for sound rectification effects like the Nautilus series, so I don't think there will be any particular problems with damping vibrations. I could put butyl rubber tape on the top of the box, but this time I decided to treat it on the inside in consideration of the aesthetics.
 1.I had leftover deadening material for car doors, so I would like to use it as a damping material. The material is like aluminum foil stuck on butyl rubber, and the damping effect seems to be high.
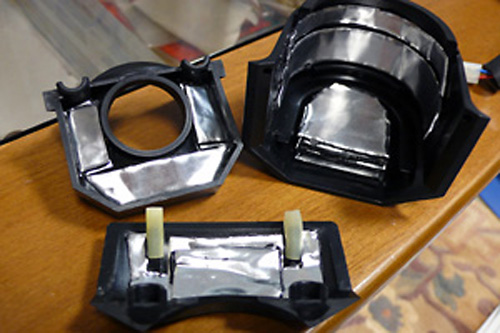 2.Cut the damping material with scissors and stick it on the back side of the case. I tried to paste as much as I could. Compared to before pasting, it is heavy and the texture seems to be different. If the tweeter doesn't fit, it's a problem, so I'm working on temporary assembly from time to time.
Assemble the box in the reverse order of disassembly.
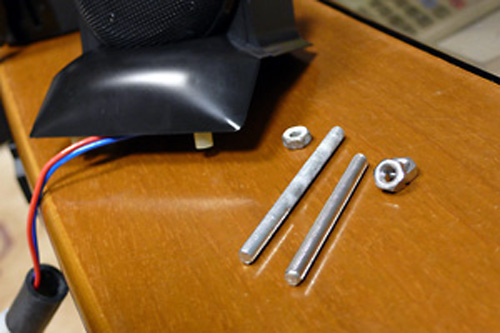 1.The genuine bolt for fixing the tweeter is made of iron and is crude, so I use the stainless steel bolt and nut on the right side of the photo. The stock bolt is 4mm in diameter and 50mm in length, but it feels too long, so I cut it a little shorter to about 40mm.
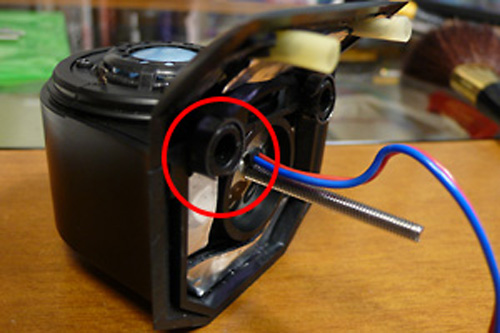 2.The bolt is screwed in and the reflector is fixed with an O-ring.
This O-ring is hard and does not fit easily. After all, I spread it a little with needle nose pliers and loosened it and then fitted it. I forgot to attach the tweeter protection net... (=^_^;=) ... Since the net cannot be attached later, I disassembled it again and attached the protective net.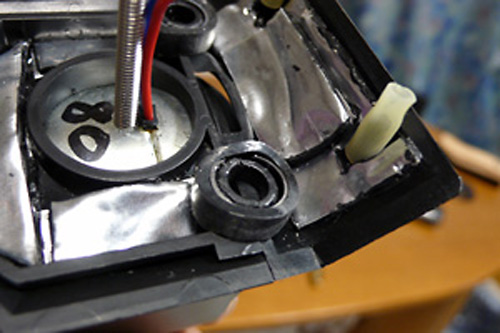 3.Furthermore, I covered the O-ring with a rubber band.
Do you know what the 80 markings on the tweeters mean ? By the way, 80 is written in magic on both the left and right sides.
 1.Pass the cord through the rubber tube and pull it into the squawker box.
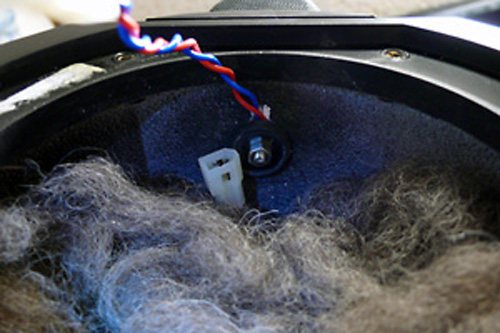 2.I fixed it with a stainless steel nut.
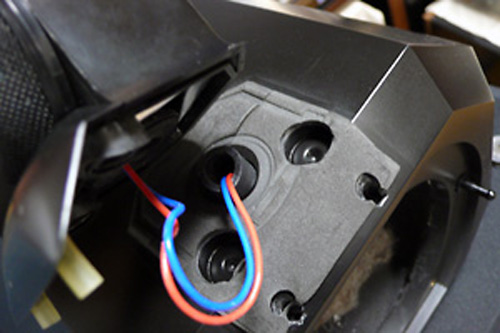
The bolt length is just right. It may be a comfort, but I tried twisting the tweeter cord. Connect the cord and attach the squawker. 3.Where the squawker is installed.
With this back to normal. When I tap on the tweeter box, I can hear that the cheesy sound is gone with a dull tapping.

I tried playing music after assembly. I felt that the high-pitched incidental sound was clearly reduced and the sound became clear. Compared to before the countermeasures, I can now raise the volume and listen. It sounds like the resolution of the bass has also increased, perhaps because of my imagination. It's a slightly recommended modification, but if you put it into practice, various troubles such as damage or loss of units and parts can be considered, so please work carefully and at your own risk.


